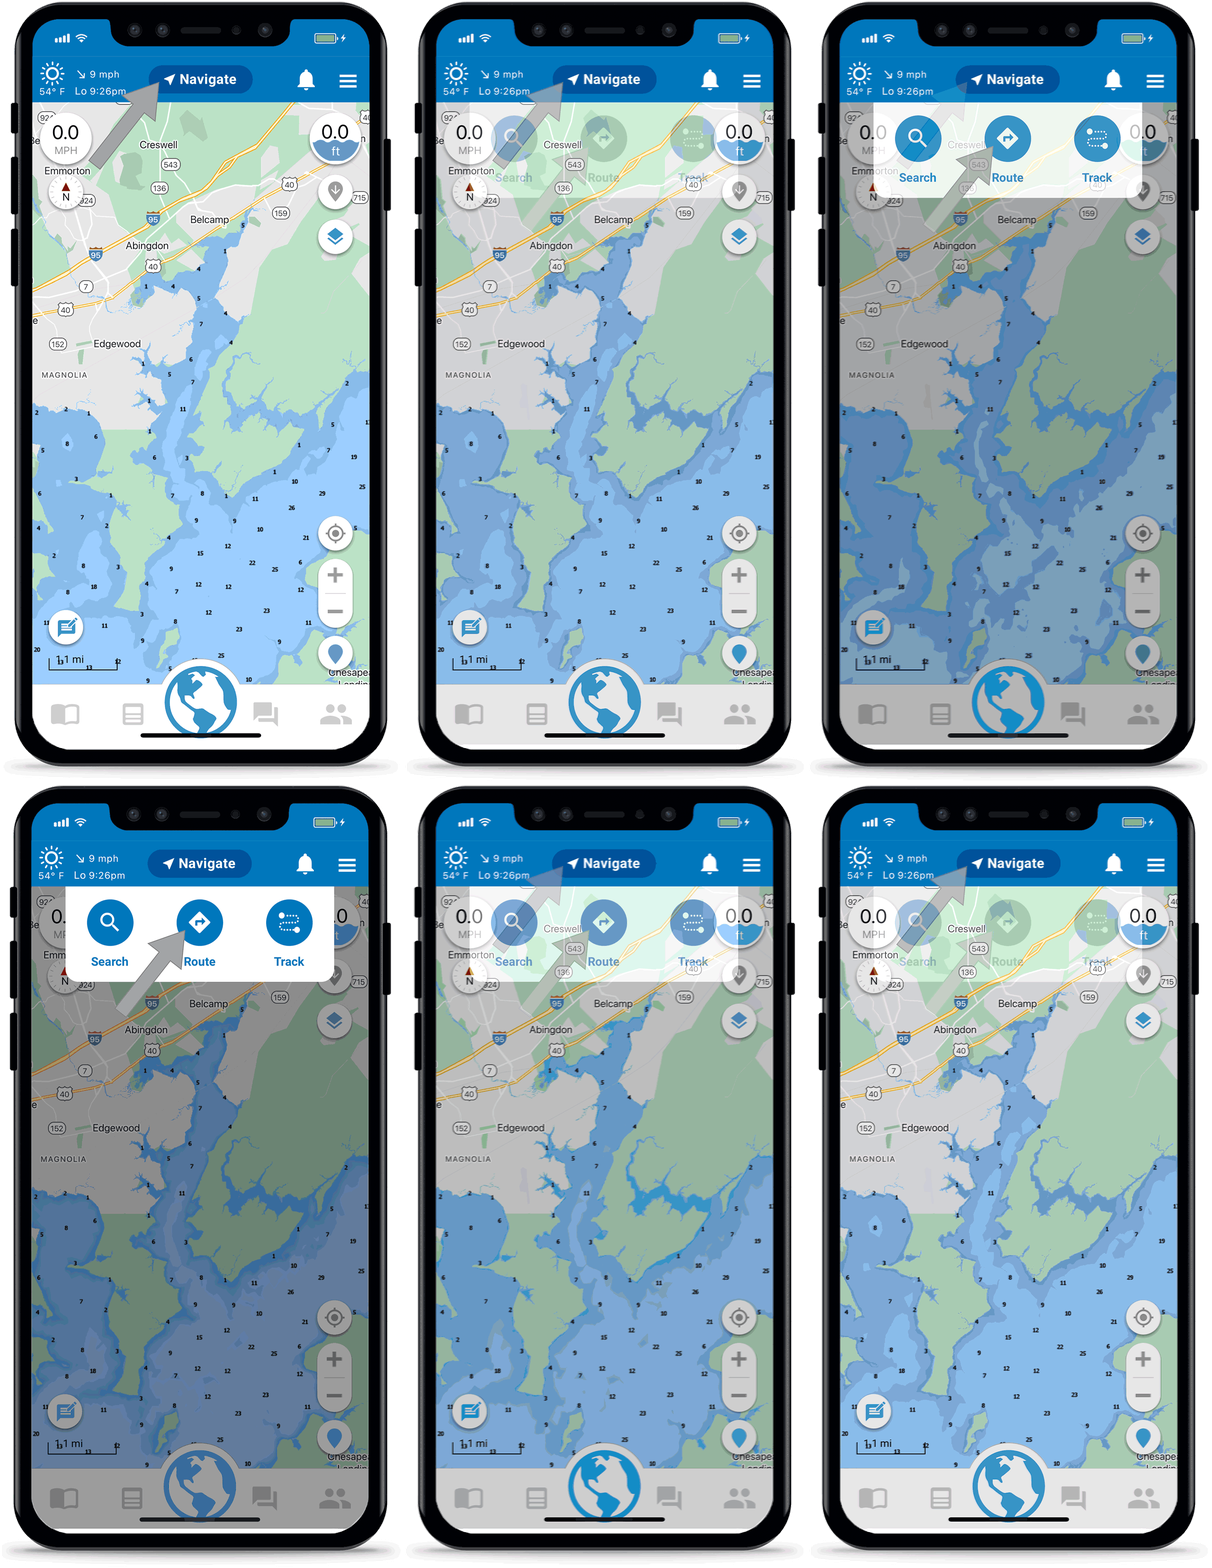
If there’s no depth data in your area or if you want to plot your own route, then you can use Argo’s manual routing option. If you want Argo to create a route for you, use autoroute.
Press Navigate Button
Found in the top menu. Then tap the Manual Route button ![]() .
.
You can also tap any place on the map or do a long press & hold and then choose “Create Route” ![]() . After selecting a starting point, it will create an autoroute but you can switch to manual routing.
. After selecting a starting point, it will create an autoroute but you can switch to manual routing.
If there is no way to autoroute based on selected start and destination, you will get a suggestion to use manual routing.
Note: If you are on a tablet you will not see a Navigate button. Simply tap the Manual button.
Switch to Manual Routing (temporarily disabled)
If you choose Create Route ![]() after tapping on an icon on the map or doing a press & hold, it will default to autoroute mode. To switch to manual routing, use the toggle at the bottom left with options
after tapping on an icon on the map or doing a press & hold, it will default to autoroute mode. To switch to manual routing, use the toggle at the bottom left with options and
![]() . Make sure that the option with the “M”
. Make sure that the option with the “M” ![]() is toggled on (colored blue). The app will remain in the mode last used, but you can change it at any time.
is toggled on (colored blue). The app will remain in the mode last used, but you can change it at any time.
If you want to use autoroute, choose the . Learn more about autorouting here.
Add Your Start Point
Set your start point by tapping the desired location on the map. You can also tap the input field at top to Search for a place or select from Home Port ![]() , Search History
, Search History ![]() , Favorite Places
, Favorite Places ![]() , Search Categories, Choose on Map
, Search Categories, Choose on Map ![]() or Enter Coordinates
or Enter Coordinates ![]() .
.
You can also optionally set your end point at this time using the destination input field.
Add and Edit Waypoints
Tap the map to add additional points to your route. A straight line will be drawn from point to point. If you set both the start and destination you will need to tap the “+” button located next to the destination field to add waypoints.
To change the location of an interim point (or start and destination) you first need to select that point by tapping the field at the top or the point on the map. The field and icon will display a blue border indicating it is selected. The icon will also be larger. Then tap the map or use a search option to move the point.
You can also press & hold the point and then drag it to a new location.
Explore Map
Once the route is created, you can tap on map icons along the route such as hazard pins or bridge warning icons before saving the route or starting the voyage.
You can also use the Explore Map button if you want to ensure taps do not inadvertently move any route points. By tapping Edit Route or the pencil in the upper right you can go back to the normal mode.
Save the Route
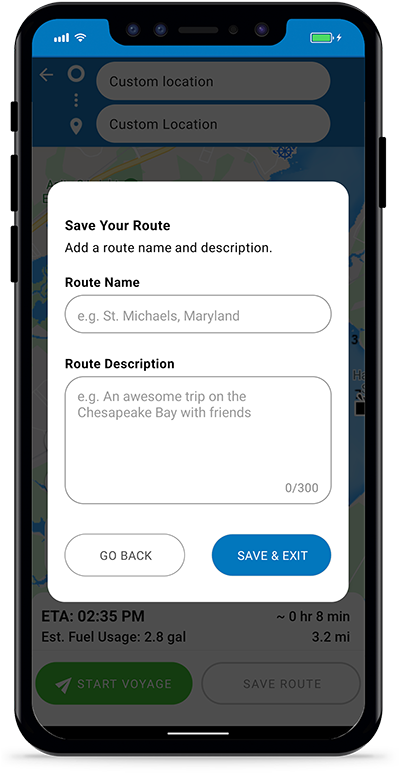
If you don’t want to take a voyage right now, you can save the route to your Captain’s Log to take later. Press the “Save” button, add a title and a description for the route, then it’ll be added to your Captain’s Log.
As a Premium user, you will also have options here to permanently display the route on the map (thin black line) or download it to your device for offline use.
Start the Voyage
If you want to take the voyage, press . For more details on taking a voyage check out the Voyage tutorial. If you don’t want to save the route to your Captain’s Log, tap the back arrow in the upper left or the “X” in the lower right to go back to the main map.


