Argo’s autoroute feature will automatically create a quick and safe route for you based off of your boat’s draft and height. It’s important to make sure your boat information is properly set up in your Profile before using autoroute because Argo uses the boat’s draft and buffer (margin of safety above draft) to make sure the route is deep enough for your boat.
To plot your own route, use manual routing mode.
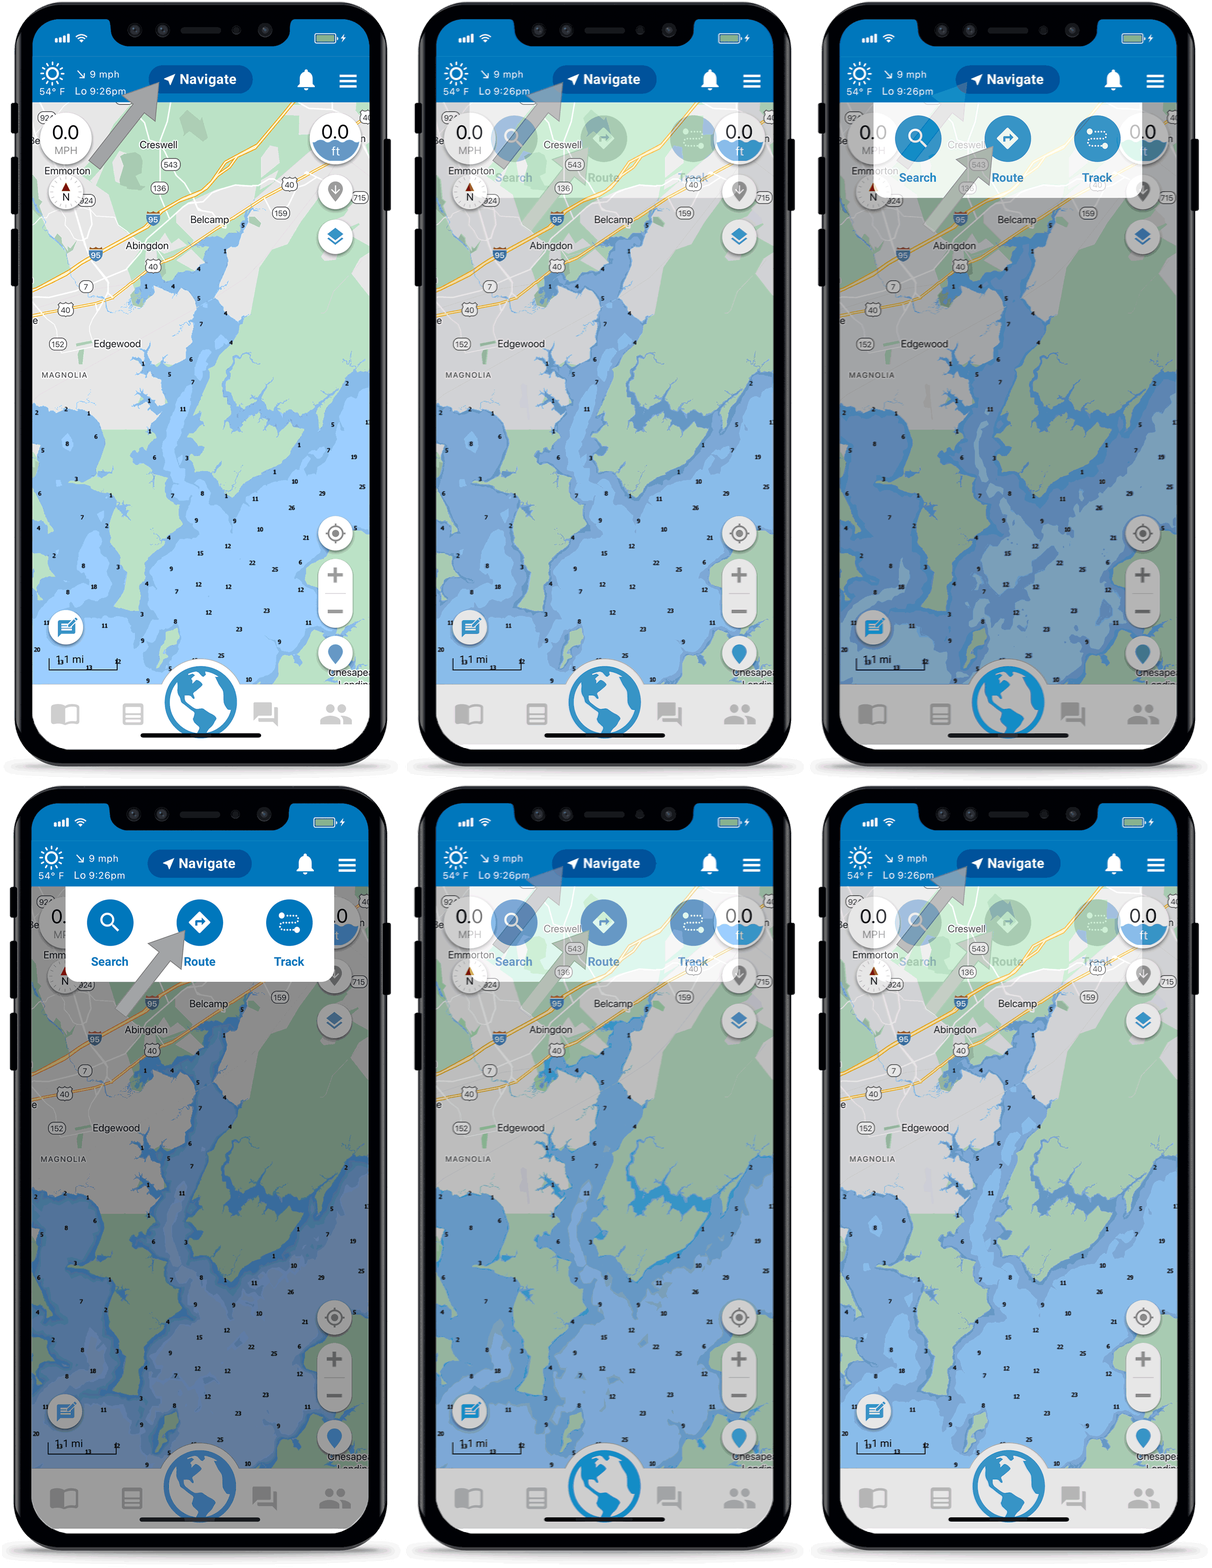
Press Navigate Button
Found in the top menu. Then select the Route button ![]() and tap the map to set starting and destination points. You can also tap any pin on the map (e.g. anchorages, buoys, mile markers) and then choose “Create Route”
and tap the map to set starting and destination points. You can also tap any pin on the map (e.g. anchorages, buoys, mile markers) and then choose “Create Route” ![]() . Finally, you can also do a long Press & Hold on the map at a point you want to route.
. Finally, you can also do a long Press & Hold on the map at a point you want to route.
Set Autoroute Mode
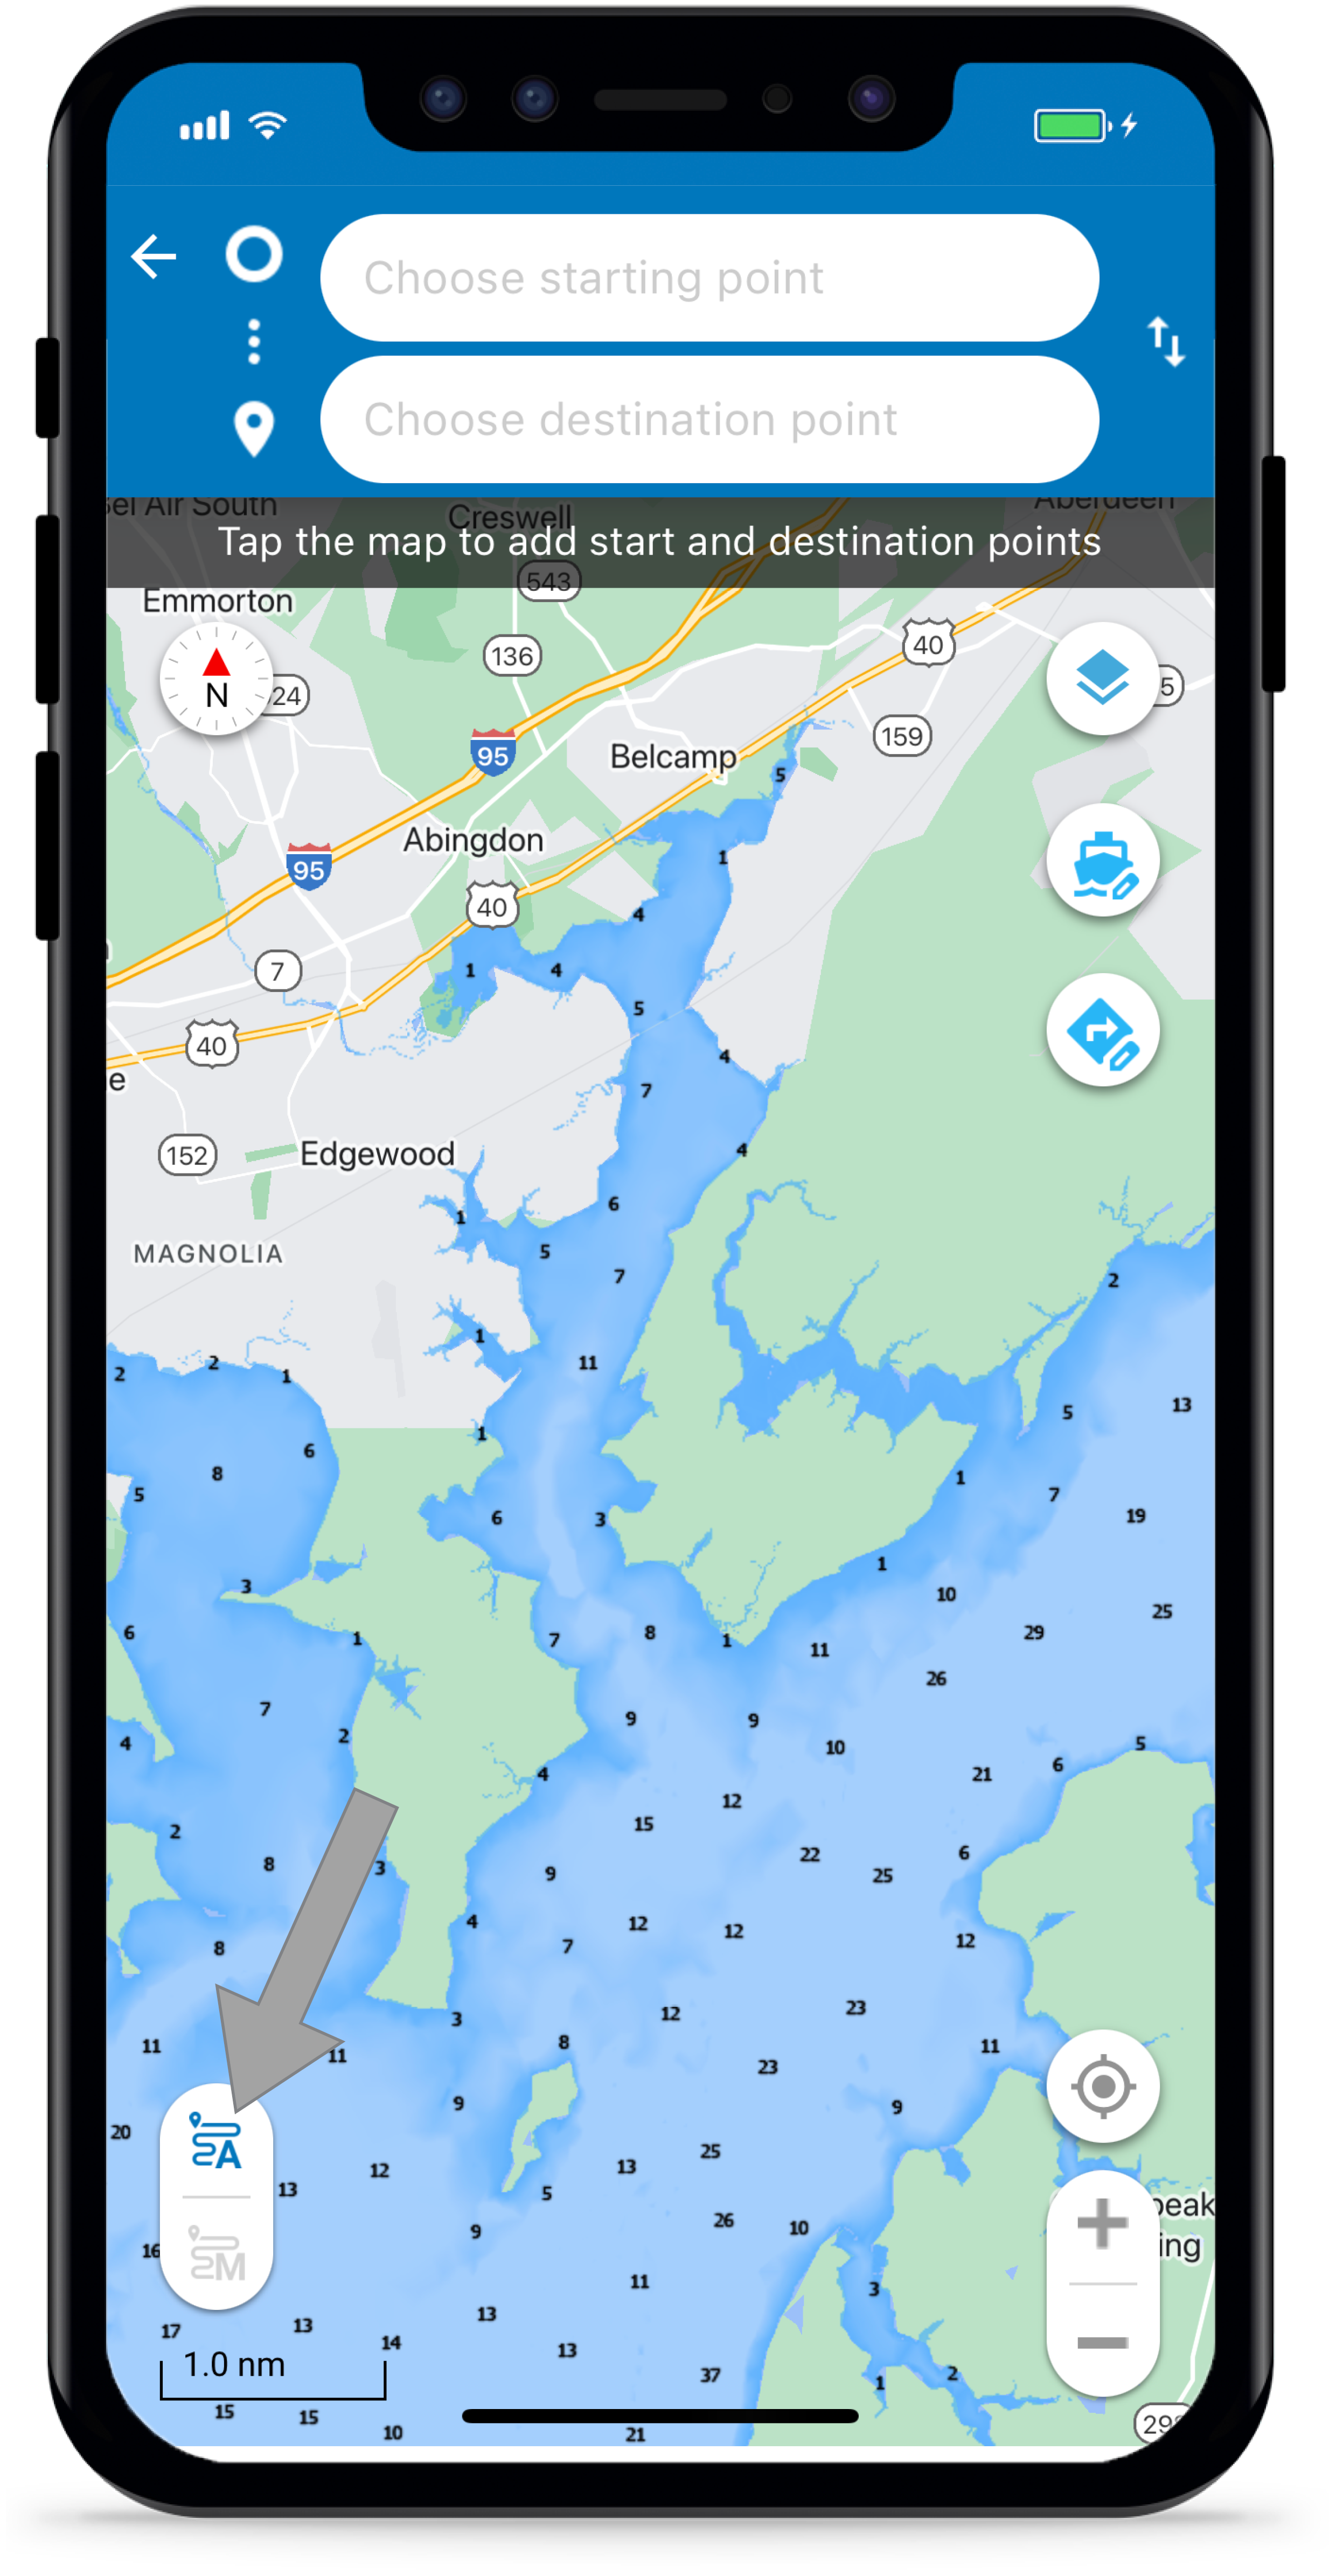
In the bottom left corner there is a toggle with options and
![]() . Make sure that the option with the “A”
. Make sure that the option with the “A” is toggled on (colored blue). The app will remain in the mode last used, but you can change it at any time.
If you want to plot your own route or if Argo does not have depth data for your area, choose the ![]() for manual routing mode. Learn more about manual routing here.
for manual routing mode. Learn more about manual routing here.
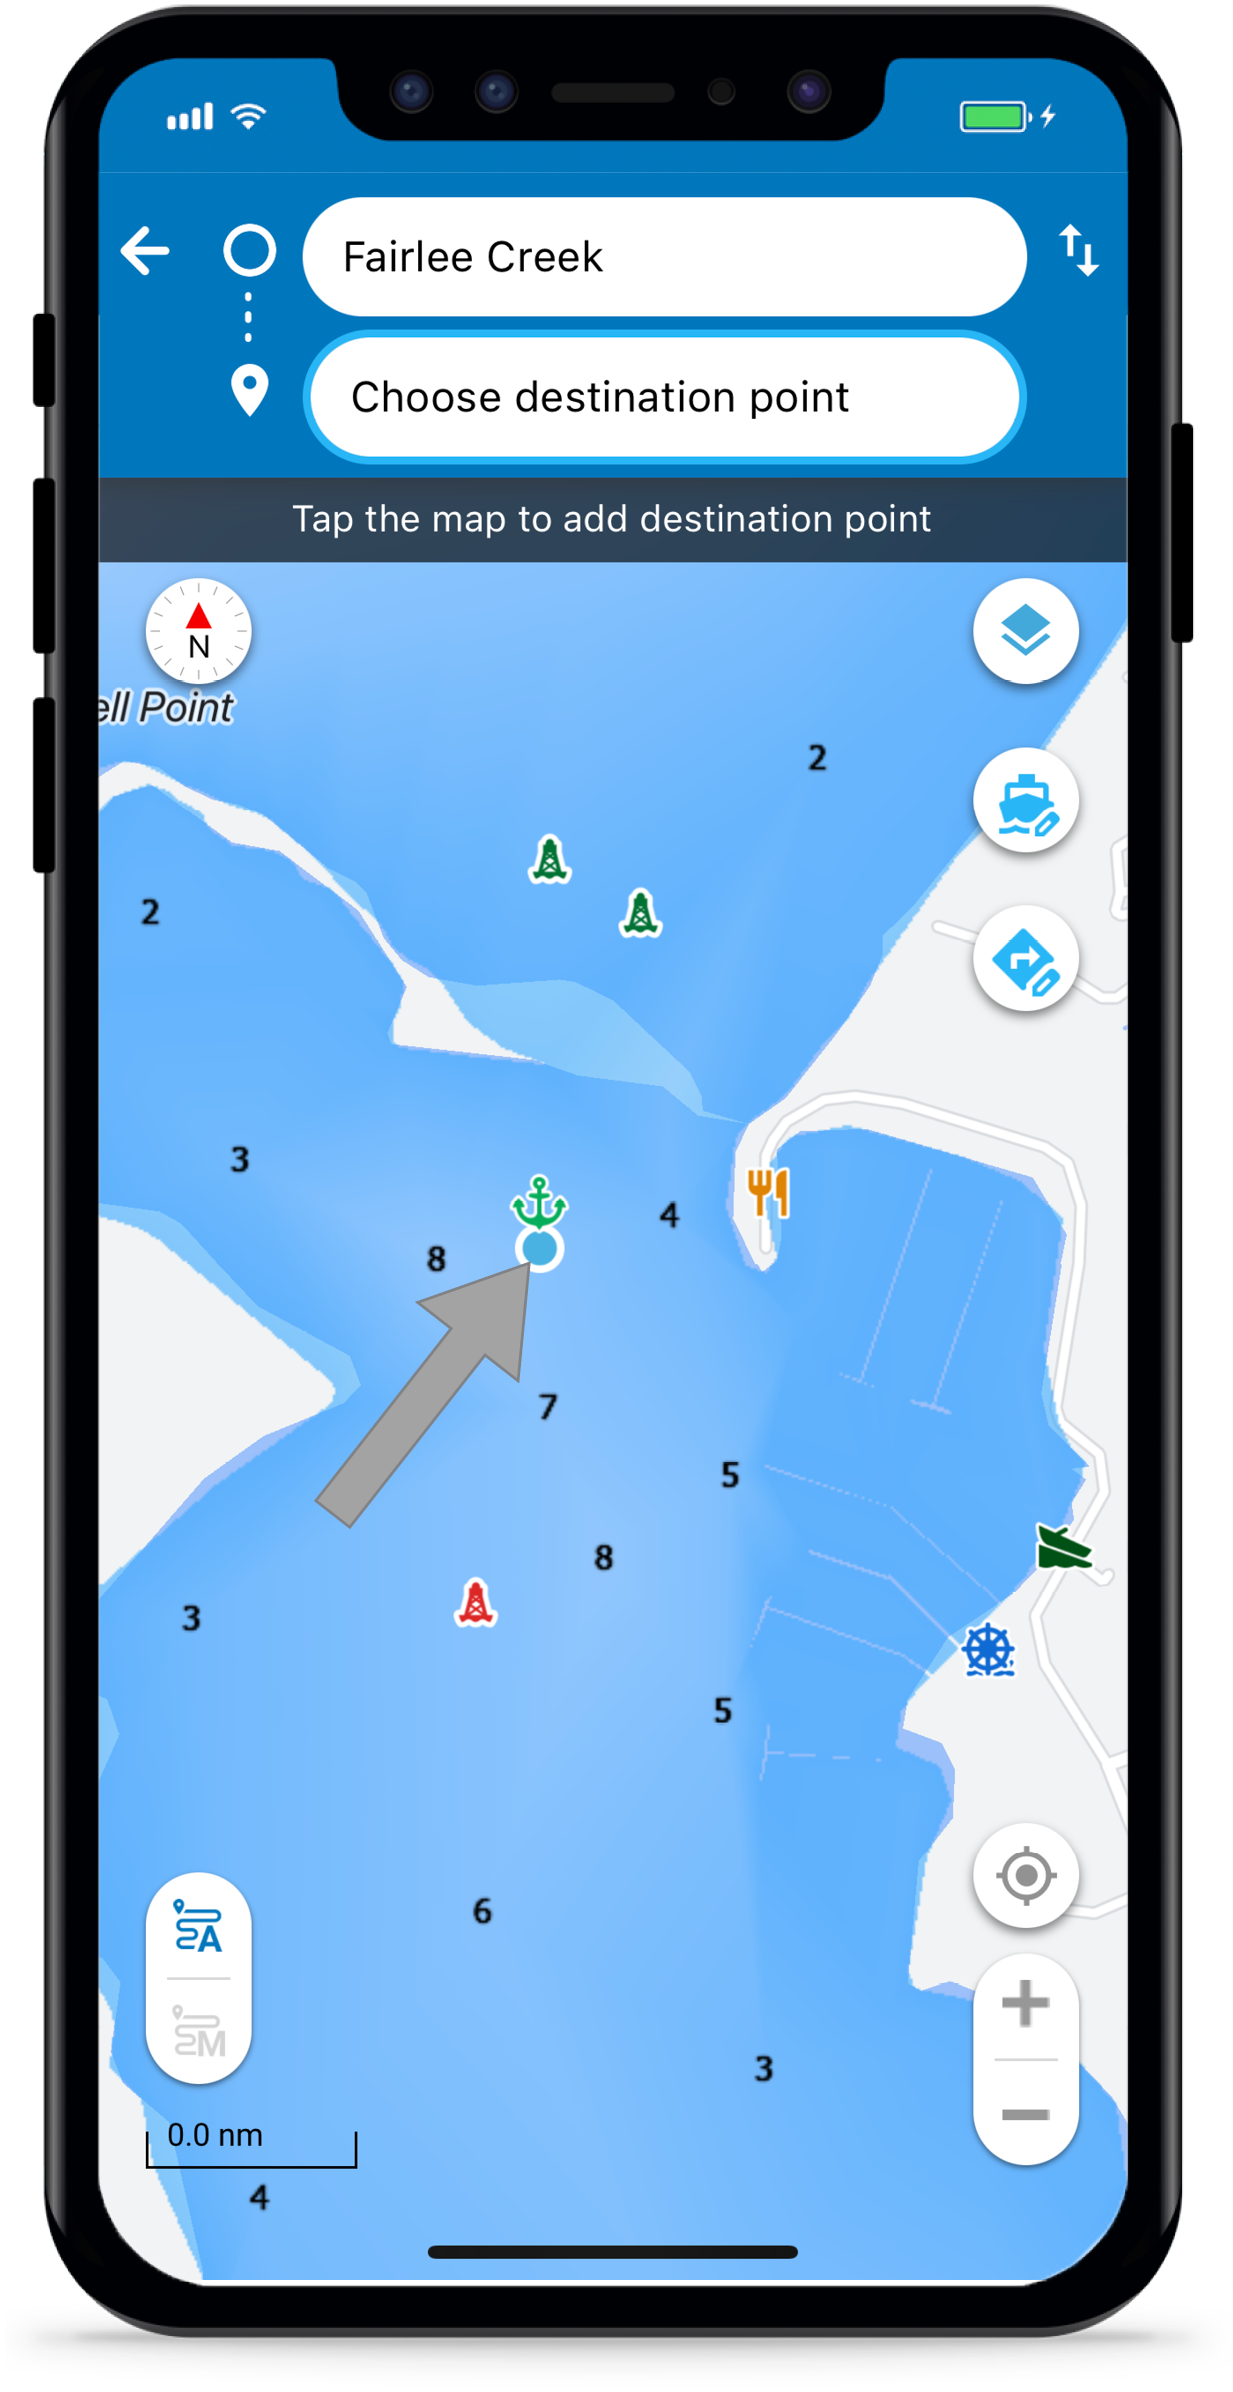
Tap Map for Start and Destination
After tapping Navigate/Route, tap the map once to set your start point. Tap a second time to set your destination and create the route.
You can tap icons on the map, such as a marina, boat ramp or even a buoy as a start or destination point for your route.
Note: If you are on the water, Argo will use your current location as the starting point. If you prefer a different location, once the preview screen has loaded tap on the Starting Point field and choose a new location.
Long Press & Hold
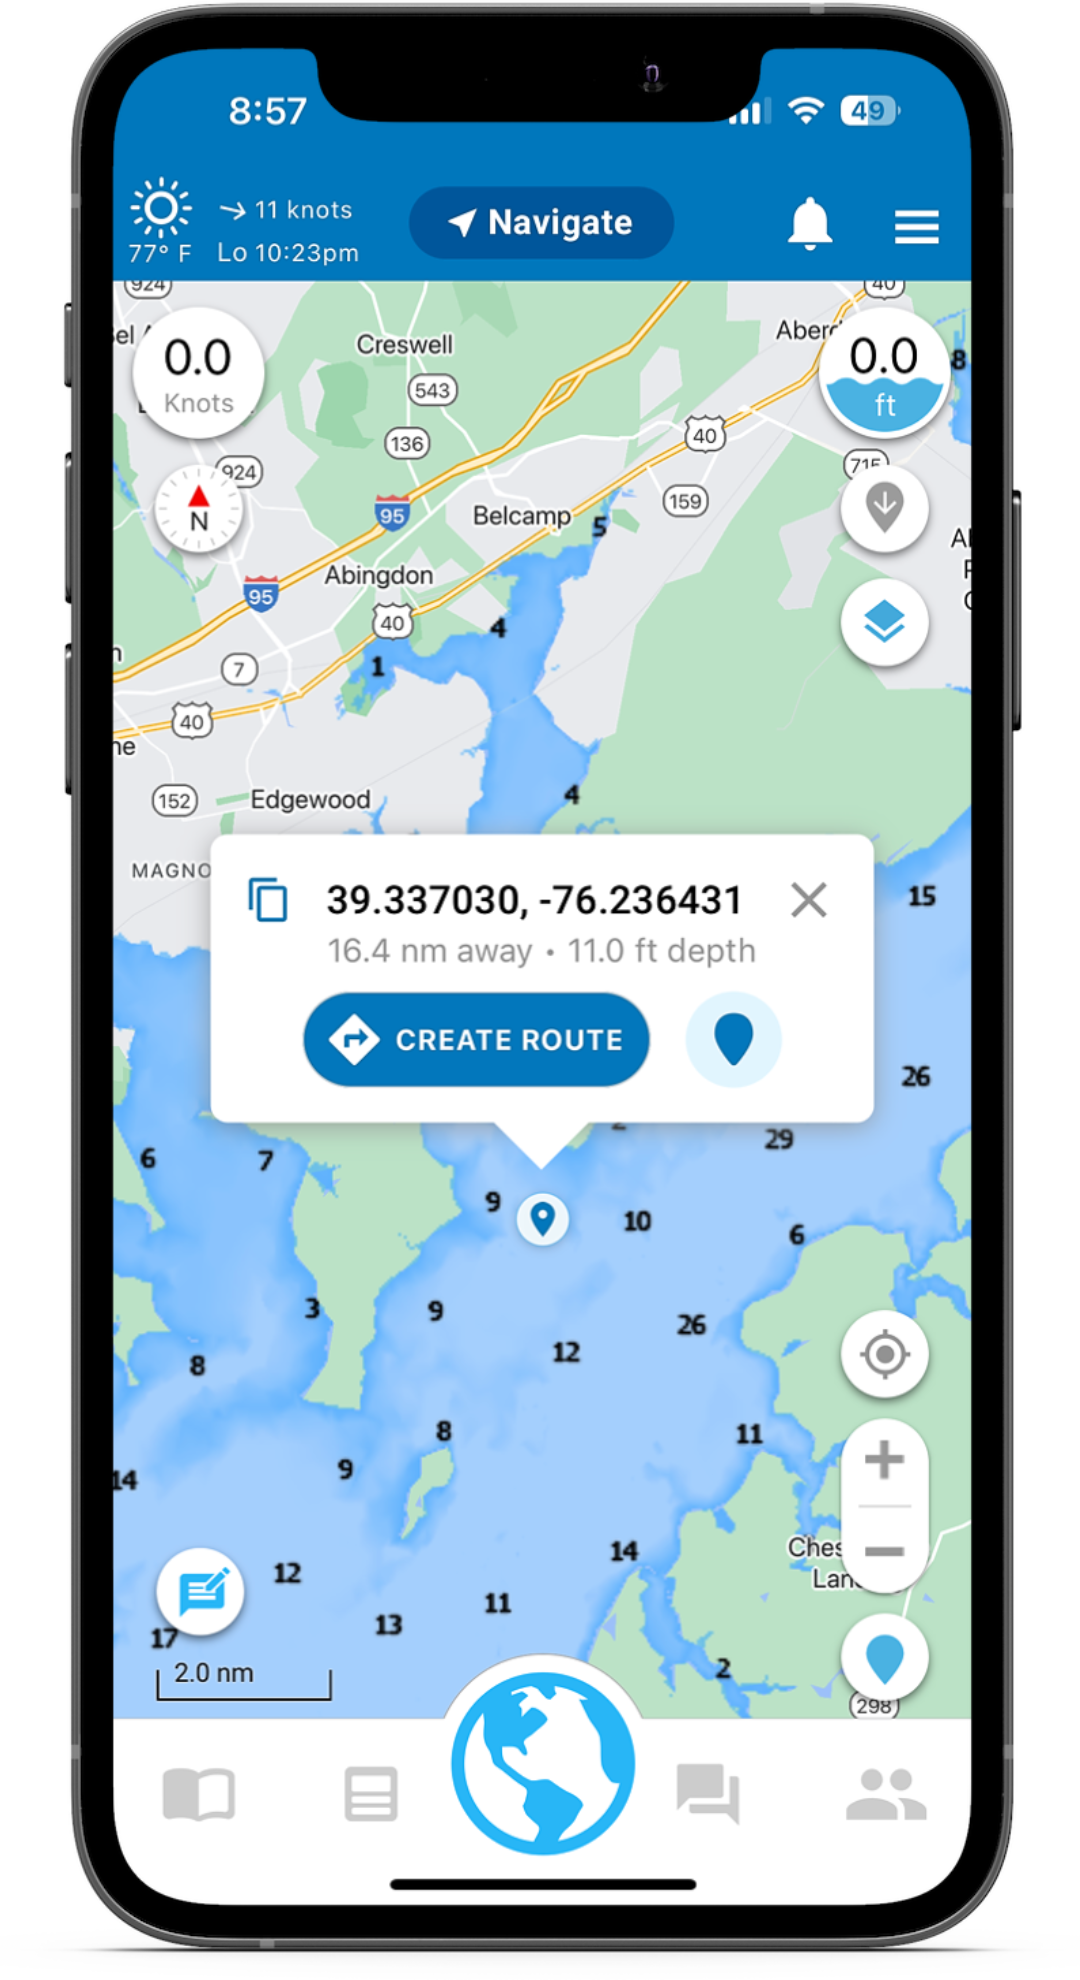
Select a point on the map you would like to route to and simply press & hold for a few seconds. A pop up will appear giving you your gps coordinates, depth, distance from your current location, Create Route button and button to drop a pin.
Tap on the Create Route button and then select your starting location. Note: If you are on the water, Argo will use your current location as the starting point. If you prefer a different location, once the preview screen has loaded tap on the Starting Point field and choose a new location.
Other Options for Setting Start and Destination Points
Tap the Start or Destination fields to get to additional options for setting your route points.
You can search for places using keywords and categories. You can also select from Home Port ![]() , History
, History ![]() , Favorites
, Favorites ![]() , Choose on Map
, Choose on Map ![]() or Enter Coordinates
or Enter Coordinates ![]() .
.
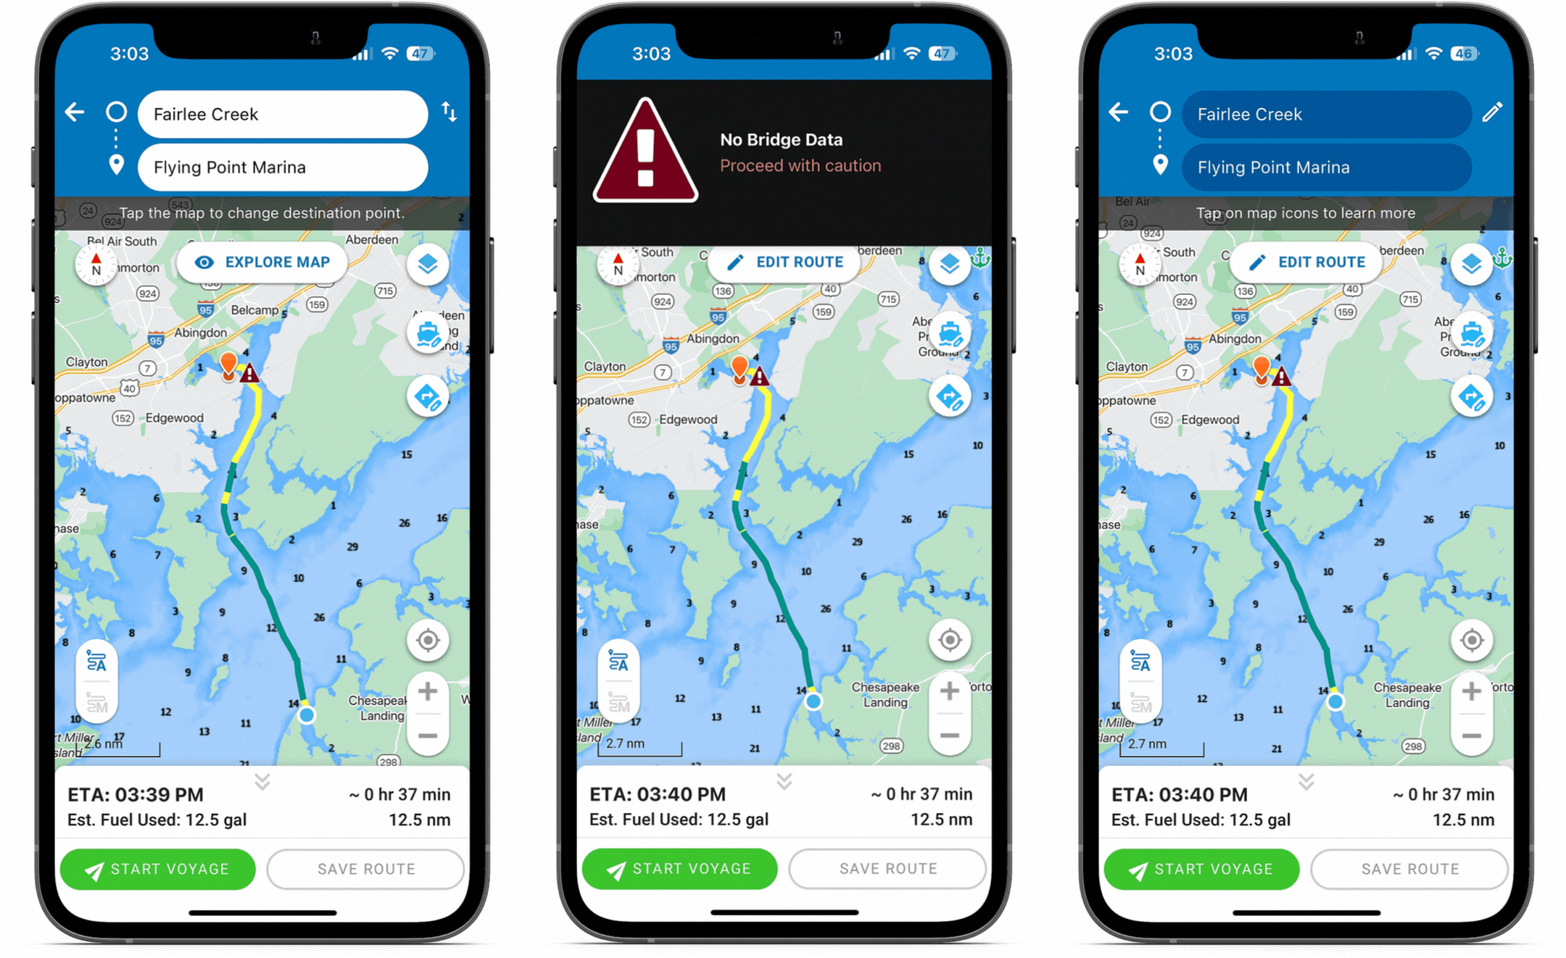
Tap Explore Map button to review icons along the route before saving or starting your voyage.

Review/Adjust the Route
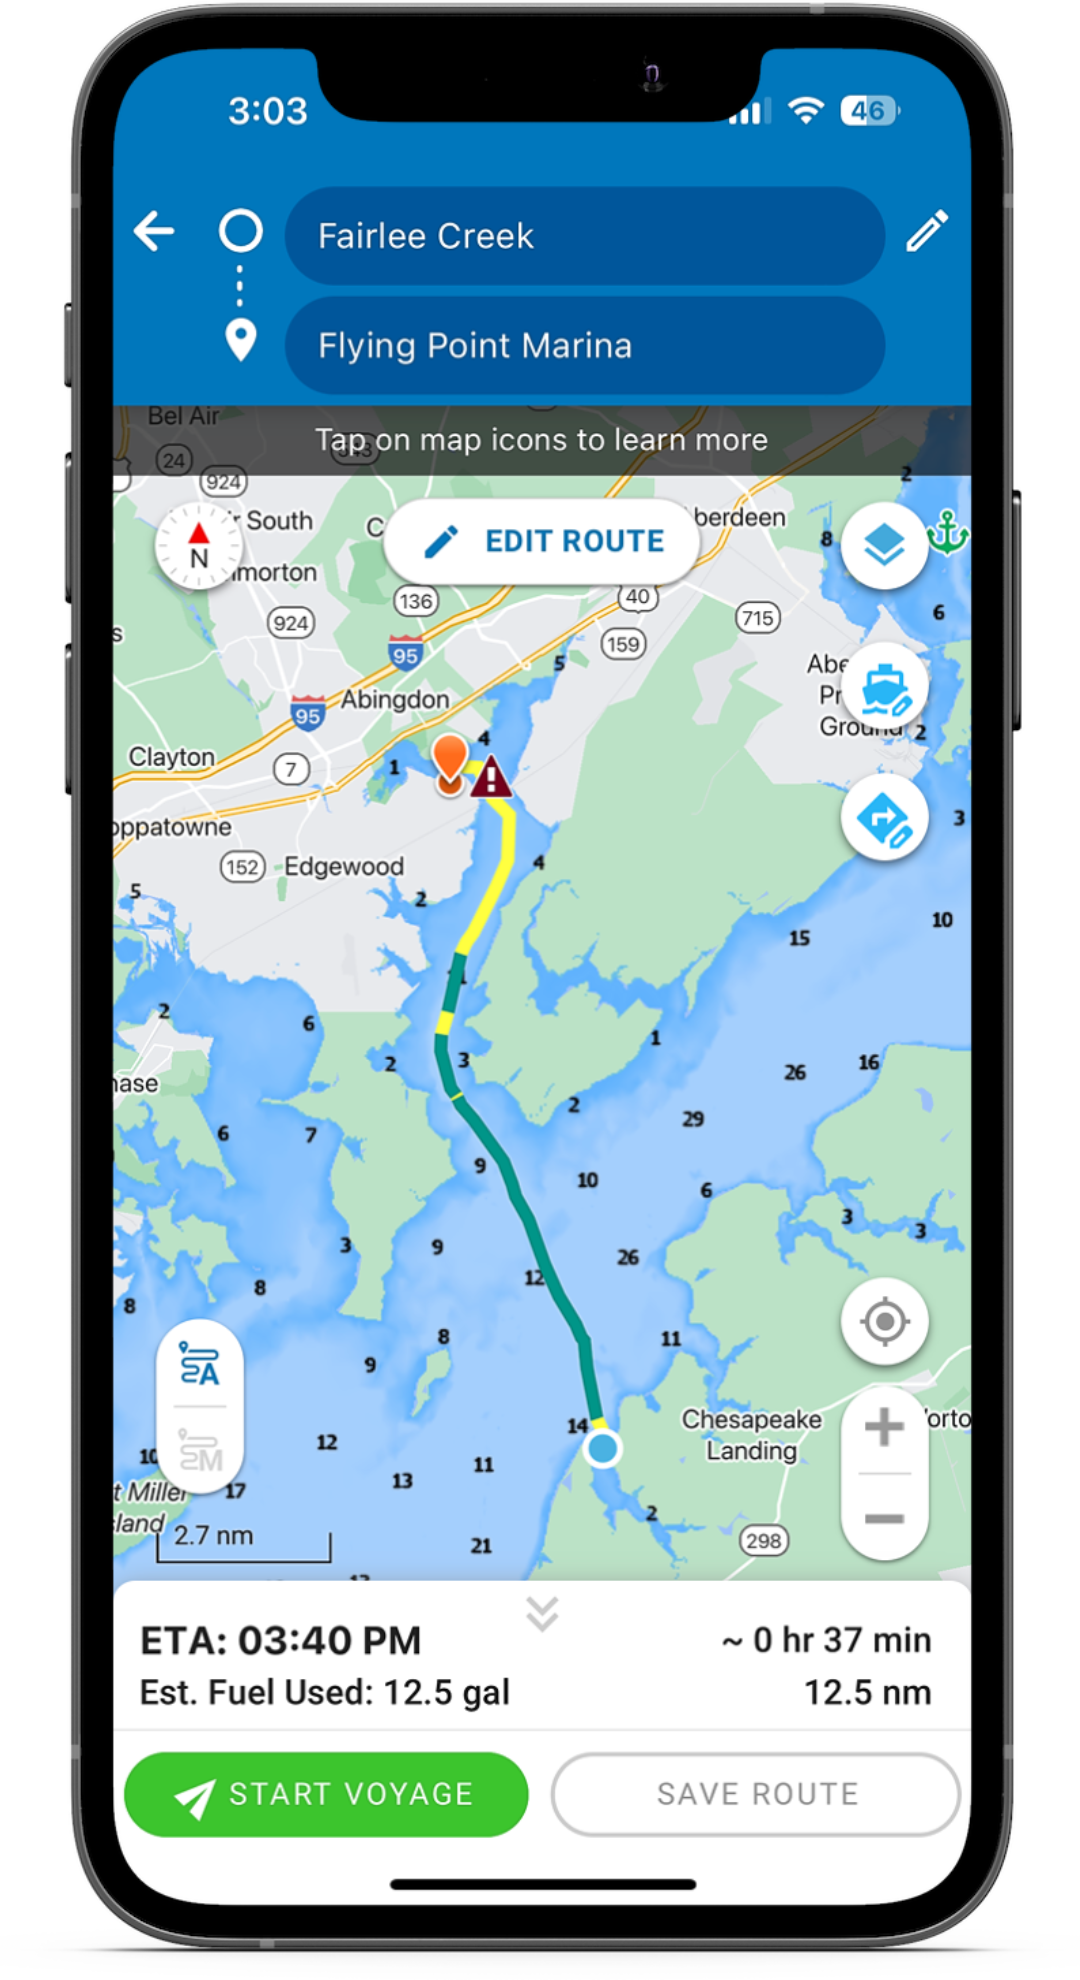
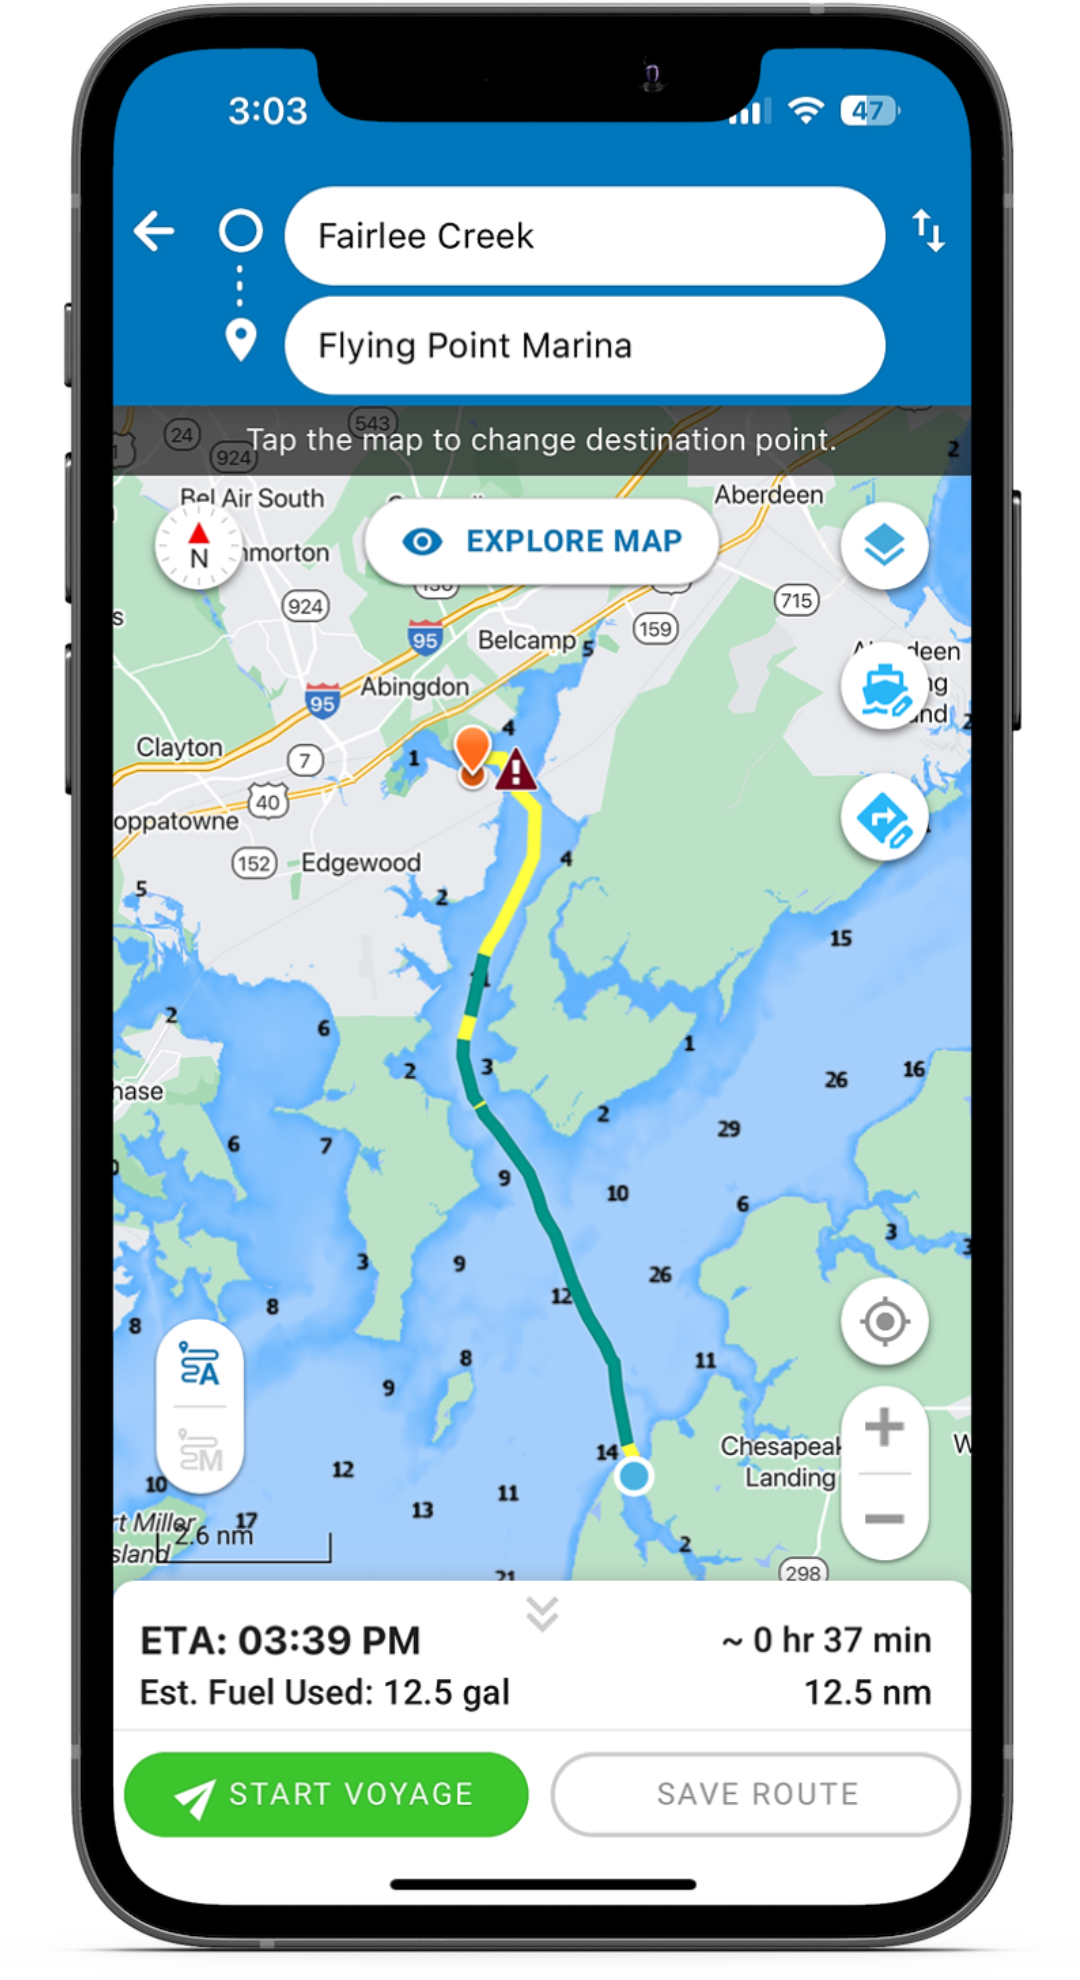
Check out the duration, distance, ETA (Estimated Arrival Time) and estimated fuel usage.
The Edit Boat Info icon allows you change your boat’s profile and updates the route and associated information on this screen.
The Route Settings icon allows you change your settings to route inside (avoid ocean) or outside.
Tap on the icon to swap the Start and Destination Points.
Make Sure the Route is Safe
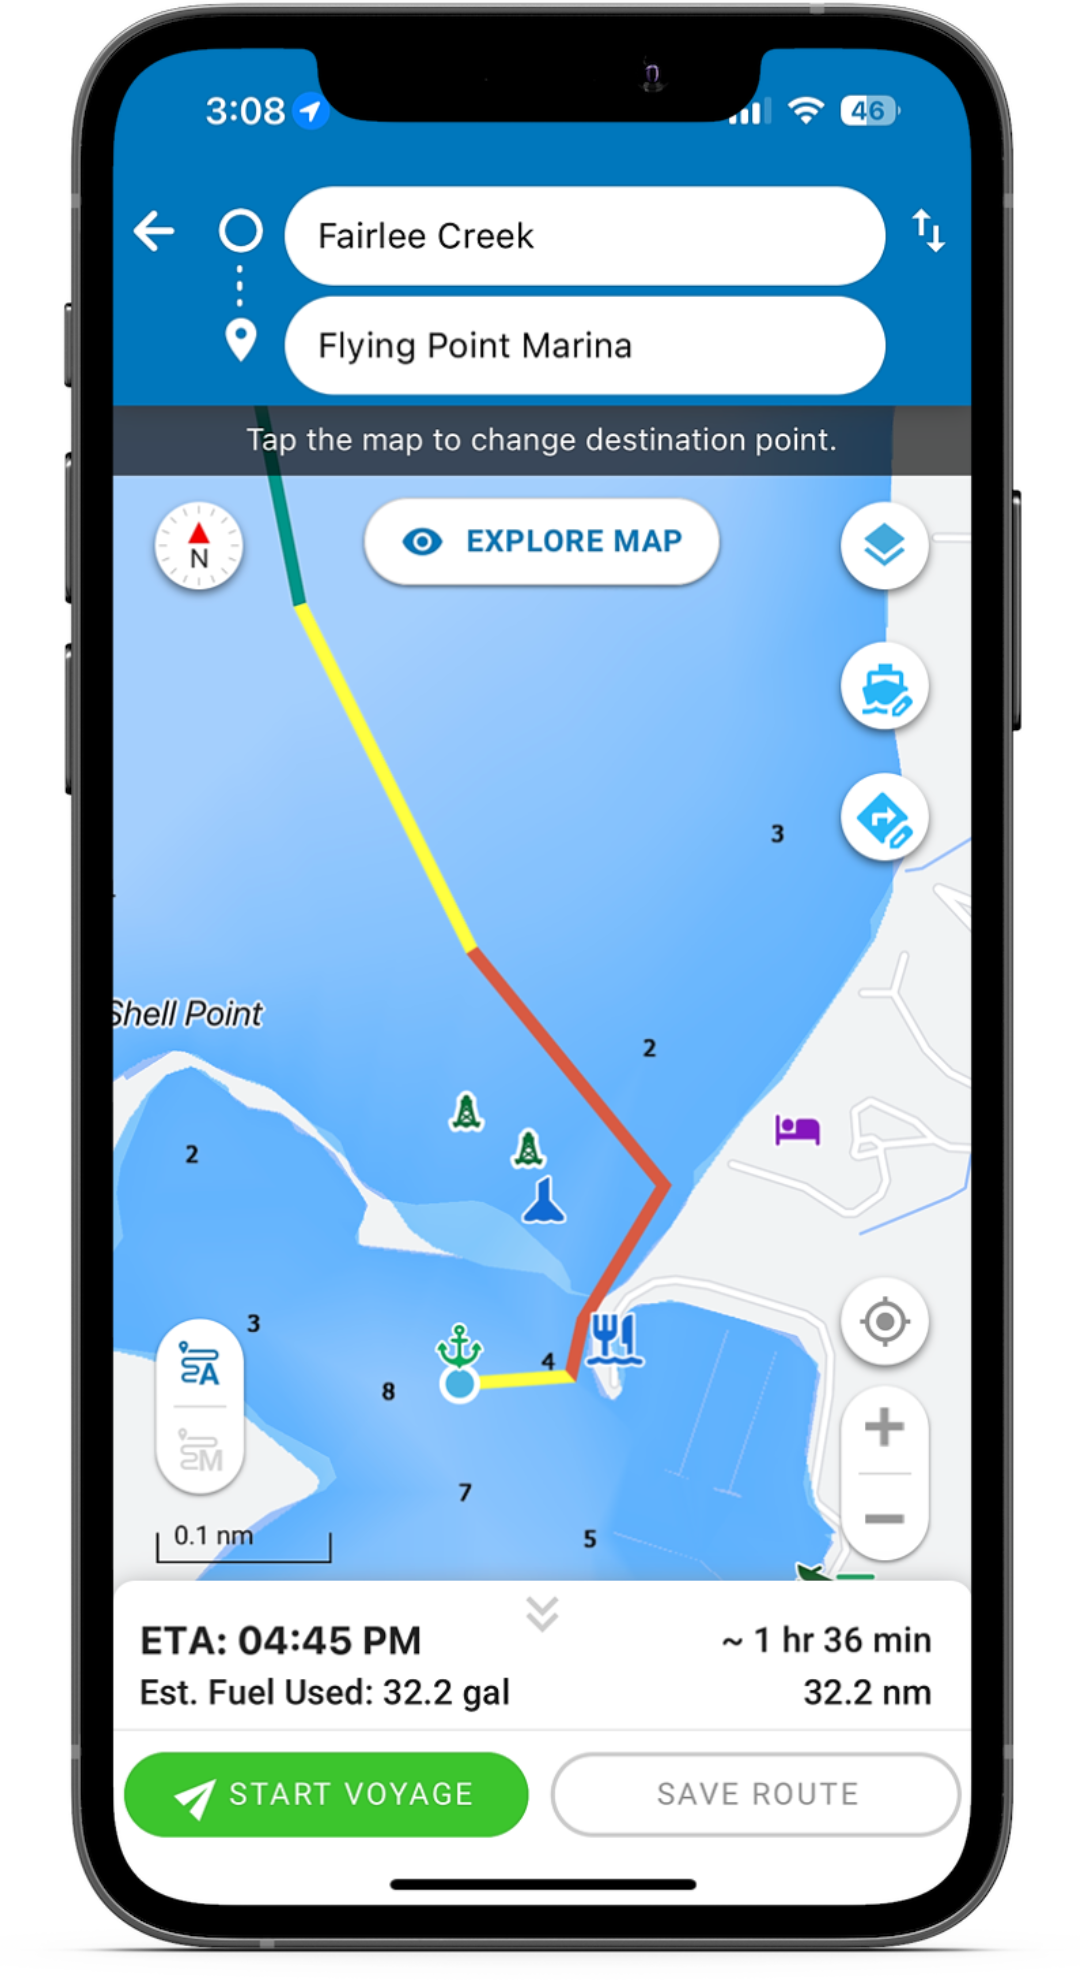
Argo color codes the route based on whether it is safe for your boat to pass. Make sure to zoom in.
- Green – Proceed
The water’s depth is safely above your draft and the buffer you have set up in your Profile .
. - Yellow- Caution
The depth is within your buffer (margin of safety). - Red – Do Not Proceed
The depth is less than your draft. Argo can’t find a safe route.
Explore Map Button
Once the route is created, the Explore Map button sets the route so additional taps on the map do not change the start or destination points. We added this for two reasons:
1. Allows you to tap on map icons along the route such as hazard pins or bridge warning icons before saving the route or starting the voyage.
2. Will allow for adding waypoints to the route (feature coming soon).
By tapping Edit Route or the pencil in the upper right you can continue to adjust the route’s start and destination points.
Save the Route
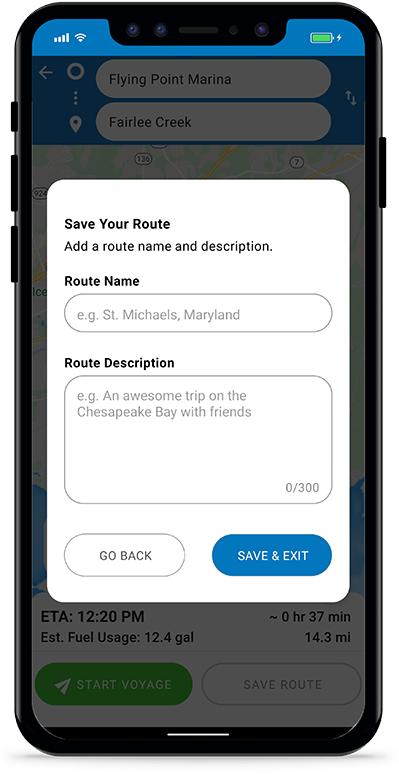
If you don’t want to take a voyage right now, you can save the route to your Captain’s Log to take later. Press the Save Route button, add a title and a description for the route, then Save & Exit and it’ll be added to your Captain’s Log.
Start the Voyage
If you want to take the voyage, press . For more details on taking a voyage check out the Voyage tutorial. If you don’t want to save the route to your Captain’s Log, tap the back arrow in the upper left to go back to the Home screen.
