If there’s no depth data in your area or if you want to plot your own route, then you can use Argo’s manual routing option. If you want Argo to create a route for you, use autoroute.
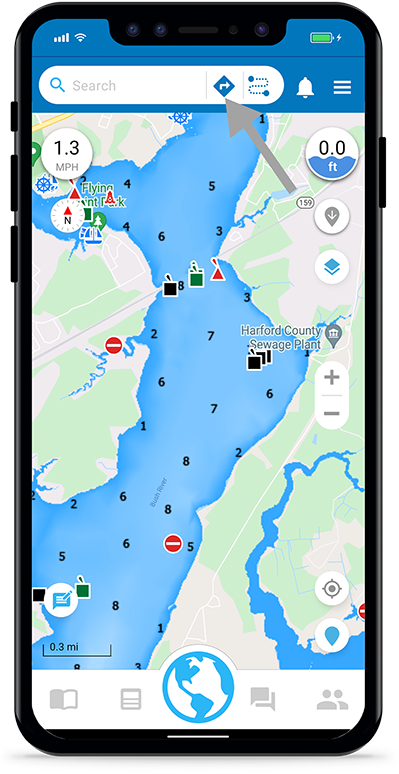
Press Navigate Button
Found in the top menu. Then tap the Route button ![]() . You can also tap any place on the map and then choose “Create Route”
. You can also tap any place on the map and then choose “Create Route” ![]() from the place details screen.
from the place details screen.
Note: If there is no way to autoroute based on selected start and destination you will get a suggestion to use manual routing.
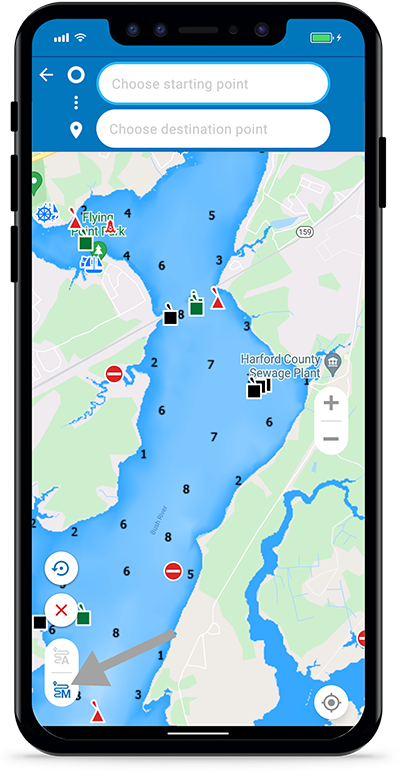
Switch to Manual Routing Mode
In the bottom left corner there is a toggle with options ![]() and
and ![]() . Make sure that the option with the “M”
. Make sure that the option with the “M” ![]() is toggled on (colored blue). The app will remain in the mode last used, but you can change it at any time.
is toggled on (colored blue). The app will remain in the mode last used, but you can change it at any time.
If you want to use autoroute, choose the ![]() . Learn more about autorouting here.
. Learn more about autorouting here.
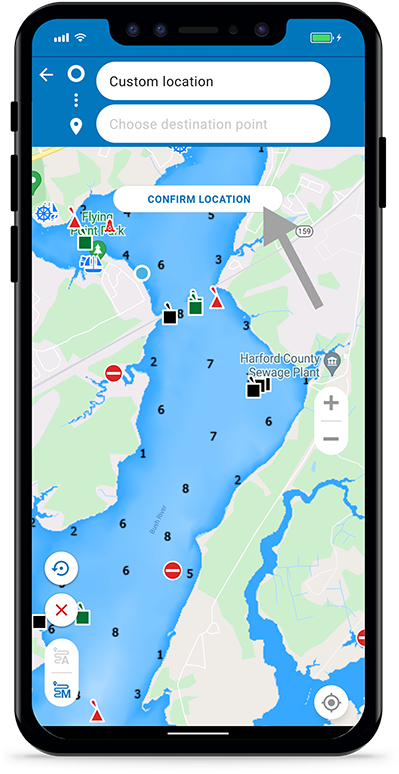
Add Your Start Point
Set your start point by tapping the desired location on the map. You can also tap the input field at top to Search for a place or select from Home Port ![]() , History
, History ![]() , Favorites
, Favorites ![]() , Choose on Map
, Choose on Map ![]() or Enter Coordinates
or Enter Coordinates ![]() . Tap “Confirm Location” after you’ve set your start point.
. Tap “Confirm Location” after you’ve set your start point.
You can also optionally set your end point at this time using the destination input field.
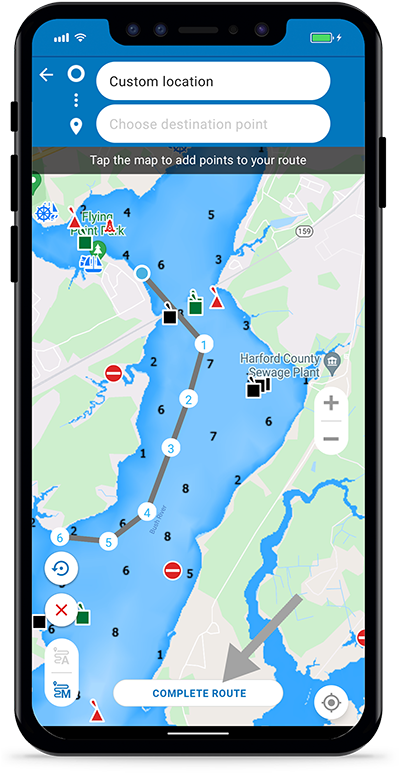
Add Additional Points
Tap the map to add points to your route.

Remove Points
If you want to remove a point tap the ![]() icon in the bottom left-hand corner. You can only remove one point at a time, starting with the most recently added point.
icon in the bottom left-hand corner. You can only remove one point at a time, starting with the most recently added point.
To remove all of the points tap the ![]() icon.
icon.

Complete the Route
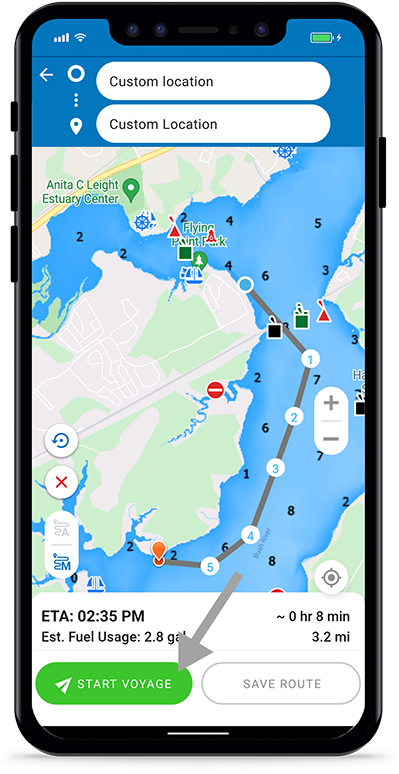
Once you’ve added all the points press “Complete Route.” If you did not manually set your end point, Argo will use your last point as an end point.
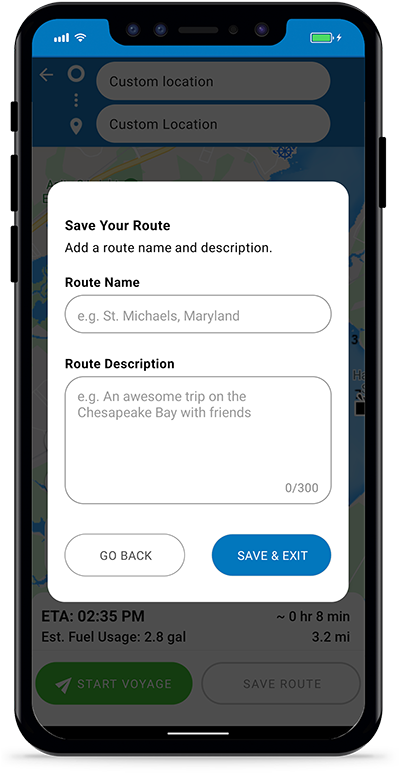
Save the Route
If you don’t want to take a voyage right now, you can save the route to your Captain’s Log to take later. Press the “Save” button, add a title and a description for the route, then it’ll be added to your Captain’s Log.
Start the Voyage
If you want to take the voyage, press ![]() . For more details on taking a voyage check out the Voyage tutorial. If you don’t want to save the route to your Captain’s Log, tap the back arrow in the upper left to go back to the Home screen.
. For more details on taking a voyage check out the Voyage tutorial. If you don’t want to save the route to your Captain’s Log, tap the back arrow in the upper left to go back to the Home screen.